How To: Setup An Additional Channel/Zone
Introduction
Your Download Player is capable of running multiple zones of music from a single piece
of software. The most common example is a hotel running a Download Player which services
their Lobby area with one style of music and their Gym with a different style.
Further channels/zones can be added to your Download Player at any time either online, or
by contacting us and requesting we do this for you.
Once you have added an extra zone to a Download Player, you will need to follow these steps
to get it setup and working alongside your other zone(s).
1) Restart Your Download Player
Your download player automatically checks for the addition of zones once a day, however, if you
do not want to wait until your player does it's daily check, your can manually make the player
check for the new zone by re-starting it.
To re-start your player, right click on the Download Player icon in the system tray
(shown at the bottom right of the windows toolbar; whilst the player is running) and from the popup menu,
select 'Exit'. Once your player has closed down, simply double click the Download Player icon on
your desktop to re-load the player.
2) Audio Setup
For single zone players the system should automatically select the default sound device as
chosen in the Windows Control Panel. In multi-zone systems you must specify each zone's
sound card by selecting it from the drop down list in the players Audio Options section.
To access the player's Options section select the spanner icon
( ),
then in the window that opens, select the Audio menu item on the left. This will present
you with the window show in the image below.
),
then in the window that opens, select the Audio menu item on the left. This will present
you with the window show in the image below.
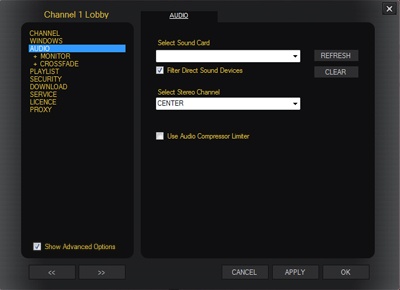
By default the system will select the CENTER from the second drop down. However you may use the
same card and specify LEFT for one zone and RIGHT for another to create two zones from one
stereo output. You must of course wire the player correctly, the stereo cable must be split
into two and them put into two separate amplifiers.
More information can be found on the
Options page of the website.